Related Posts Plugin for WordPress, Blogger...
Visualizzazione post con etichetta Recipes. Mostra tutti i post

Gluten free pie-crust with apricot jam and oil dough

>> 11 settembre 2012

© All rights reserved.

Hi gluten free friends,

this is a typical Italian simple pie, usually it is made with butter. Today I've used sunflour oil instead of butter.
Please note that the photos can be seen in the Italian recipe only, click on this LINK.

 
Ingredients:

  • 300 grams gluten free flour mix for cakes Mix Pâtisserie "Mix C" (brand: Schär)
  • 100 grams sunflour oil
  • 90 grams white caster sugar (the original recipe foresaw 100 grams)
  • 1 egg + 1 egg yolk  
  • 1 teaspoon of baking powder [*]
  • 1 coffee-cup of cow milk
  • the tip of a teaspoon of xanthan gum [*]
  • 1 pinch of salt
  • grated zest of half a lemon
  • 400 grams apricot jam [*]
  • Ø24cm round springform baking tin pan 

[*] all these ingredients must be clearly labelled as "gluten free" and/or "gluten and wheat free" so that this recipe could be safe for coealiacs.


Directions:

  1. In a large bowl combine flour and sugar, then, create a well in the center and put here all the other ingredients of the dough with the exception of milk and jam (of course).
  2. Start to mix them with the spatula until you obtain a classic "crumble".
  3. Then pour the mixture on the pastry board and mix it quickly with hands, adding a dash of milk a little at a time until you form a smooth dough-ball, fairly soft but not mushy (see the picture). The milk should be added when necessary in order to mix the ingredients better; just for information, at the end I used a little bit more than half a coffee-cup.
  4. Wrap the dough-ball with a plastic wrap and put it in the fridge for half an hour at least.
  5. Grease properly both the inner sides and the base of the baking tin with some sunflour oil (you can use a small pastry brush),if necessary, remove any excess of oil by means of some paper towel.
  6. Take a piece of dough from the dough-ball (keep the remaining dough in the fridge), put it between two sheets of baking paper and roll with a rolling pin. In order to obtain a good result: roll a little, rotate the sheets a quarter turn, roll a little more, rotate a quarter turn more etc. until the dough is approximately 7 millimetres thick. Roll until the diameter of the dough a little bit smaller than the base of the baking tin.
  7. Open the springform baking tin pan (detach the base from the ring).
  8. Overthrow the dough-disc into the base by helping with one of the baking paper sheet; this dough is less elastic than the one with butter, it may break a little, just try to repair the cracks.
  9. Mount the ring again.
  10. Take a piece of dough and create a small roll by rolling it under your fingers over the pastry board.
  11. Put this roll against the inner side of the baking tin, forming an edge of dough all around the base (approx height: 1.5 centimetres).
  12. Sprinkle the apricot jam on the base of the pie and spread evenly with a spoon or a spatula.
  13. Preheat the oven (180°C)
  14. Get some decorations (half moons, suns, stripes .... etc.) from the remaining dough and put them on the apricot jam.
  15. Bake at 180°C for 35 minutes (time may vary from oven to oven)
  16. Let cool completely before removing from the baking tin pan and cutting.
  17. It's a pie that crumbles a little but I hope that you could enjoy it for breakfast or a snack.
NOTE: if you do not use all the dough, you can roll with a rolling pin and obtain some cookies (remember to put the dough between two sheets of baking paper) or freeze the dough for any future use. 

© All rights reserved.
.

Read more...

Gluten free homemade pasta

>> 27 gennaio 2010

© All rights reserved


Are you celiac? Do you like homemade pasta? Do not worry, you can continue to prepare and eat homemade pasta by using a special gluten free flour mix made by the Italian Company "BiAglut". To be celiac do not mean to renounce to good Italian food.
I've tested this gluten free flour in making the fresh homemade pasta and the result was very good.
It's often easier to buy pasta in a store but it's much more nice to make it by yourself!

Ingredients for two people:
  • 200 grams gluten-free flour, brand: BiAglut (web site is here), [*]
  • 2 eggs
  • some gluten free rice flour [*]
  • a pinch of salt
  • some water
[*] all these ingredients must be clearly labelled as "gluten free" and/or "gluten and wheat free" so that this recipe could be safe for coealiacs.

By the way BiAglut gluten free flour, look at this LINK for more info about this product.

  • place the BiAglut flour on a wood board or work surface and make a well in the centre, pour the eggs into the hole. Add a pinch of salt.
  • work the flour and the eggs together firstly with a fork and then with a plastic spatula (like the one in the photo).
  • using your hands, mix the ingredients together, incorporating little by little, until everything is combined (adding just a drop of water if necessary and no more). Knead the pieces of dough together; firstly the dough is sticky but, while you continue to knead, it becomes smooth. Knead it for some minutes until it become perfectly smooth like in the photo. In order to avoid that the dough glues to the wood board, put some rice flour on the surface of the board.

  • put the dough into a plastic bag because the gluten free flour dries rapidly.
  • separate the dough into two pieces (while you work the first piece, remember to keep the second one in the plastic bag).
  • flour your work surface with some rice flour and start to roll out one of the two pieces of the dough with a rolling pin. Roll from the middle, flouring the surface with rice flour in case of need. Flip over the dough sometimes and continue to roll until you obtain a sheet with circular shape and desired thickness (look at the photos).
  • flour both faces of the sheet with some rice flour and roll up the sheet on itself, cut the sheet into some strips (width: 6.0 mm.) with a sharp blade like in the photo. Well done, you've just obtained the famous Italian "Tagliatelle".
  • shake the strips one by one with your hands to free them.
  • put some rice flour on a server and put the strips on it (you can put some rice flour over to avoid that the strips stick each other).
  • rool out the second piece of the dough as you did the first.
  • heat some water in a big pan, salt it when boiling and pour your homemade pasta into it (before pouring it, remember to remove the most of rice flour).
  • since it is fresh, it will cook in few minutes. When the pasta comes to the surface, taste it in order to check if it's ready or if it's necessary to cook for some minutes more. Keep in mind that, tasting the pasta from time to time, might help to find your personal cooking time. Do not let it overcook!
  • strain the pasta and season it with the sauce and some raped Parmigiano Reggiano ........ yummmmmmmm!

NOTE:
if you have prepared a big quantity of Tagliatelle and you don't want to cook all, you can well dry them in a fresh place for 1-2 days and then use it in the following days/weeks.

© All rights reserved
.


Read more...

Pasta con zafferano e verdure

>> 4 giugno 2008

Ricetta con indicazioni anche per i celiaci.

Oggi vi propongo questa ricetta semplice e che a noi piace molto.


Ingredienti per 2 persone:

  • 180 gr di pasta (*), ieri ho usato i rigatoni ma l'ho già fatta sia con le penne rigate che con i fusilli
  • 1 confezione da 80gr di pancetta affumicata a dadini (*)
  • 1 scalogno
  • 3 zucchine piccole (peso complessivo 140 gr)
  • i fiori delle zucchine
  • 1 bustina zafferano (peso indic. 0,125-0,15 grammi)
  • Parmigiano Reggiano grattugiato
  • sale, pepe, 1 noce di burro

(*) per i celiaci: utilizzare solo i prodotti elencati nelle categorie "pasta - gnocchi" e "salumi - insaccati" del Prontuario dell'A.I.C. e/o quelli inseriti nel Registro Nazionale Alimenti dietetici senza glutine del Ministero della Salute attualmente validi.


In una padella antiaderente mettere la pancetta a rosolare (senza olio oppure usarne poco) sul fuoco non molto forte, quando comincia a sciogliersi il grasso aggiungere lo scalogno tritato e poi le zucchine tagliate a rondelle. Quando uso le speck invece metto un po' più di olio in padella.
Incoperchiare, abbassare la fiamma e lasciar cuocere mescolando ogni tanto, se necessario aggiungere un paio di cucchiai da minestra di acqua per evitare che si attacchi al fondo della padella. Quando le zucchine sono quasi cotte aggiungere i fiori tagliati a fettine sottili, proseguire la cottura ancora per qualche minuto e poi spegnere il fuoco. Sciogliere una bustina di zafferano in un cucchiaio di acqua e mescolare il composto. Salare e pepare a piacere.

Nel frattempo far cuocere la pasta al dente, quando è cotta, rimettere sul fuoco la padella, versare la pasta, mescolare bene gli ingredienti per un paio di minuti e condire il tutto con una noce di burro. Togliere la padella dal fuoco e servire con parmigiano grattugiato.

NOTA: l'ho già preparata anche utilizzando 2-3 asparagi tagliati a rondelle oppure una bella manciata di piselli surgelati al posto dei fiori di zucchine e a volte uso lo speck (*) al posto della pancetta, dipende da quello che ho in casa.


  Gluten free pasta with saffron and vegetables.
First of all, buy a good-quality commercial dry pasta (pasta has to be "made in Italy"). By the way the shapes, I always use "fusilli" or "penne rigate" or "mezze penne rigate" or "sedani rigati" ...... or any other short pasta (I don't use "ditalini rigati" for this recipe because they're too short). These shapes are rather common and you should find abroad easily.


In the photo you can see, from left to right, the following shapes:

- sedani rigati (ridged tubes)
- ditalini rigati (small ridged tubes)
- fusilli (twists)
- mezze penne rigate (ridged half quills)
As you know, we (Italians) have a lot of fantasy and each producer can call the shapes in a different manner.
Ingredients for 2 servings:
- 180 grams short gluten free dry pasta [*]
- 80 grams bacon cut in small pieces
[*]
- 1 small onion or 1 shallot, finely chopped
- 3 small green courgettes (approx total weight 140 grams)
- 3 flowers of the courgettes (if possible)
- 0,125-0,150 grams saffron (it
contributes a luminous yellow-orange colouring to pasta)
- grated Parmigiano Reggiano cheese (Italian Parmigiano is gluten free!)

- extra-virgin olive oil, salt, pepper

[*] all these ingredients must be clearly labelled as "gluten free" and/or "gluten and wheat free" so that this recipe could be safe for coealiacs.

Directions:
Rinse and cut the courgettes into thin discs (about 3-4mm thick); if they are big, I cut the discs in the middle too. Rinse the flowers of courgettes, remove the pistils from each flower and cut the flowers into pieces/slices.
Put the bacon into a big frying pan and brown over a low-medium heat for few minutes. I don't use any oil because the bacon is rather fatty but, if you like a tastier course, you can put 1-2 tablespoons of extra-virgin olive oil into the frying pan before pouring the bacon. When fat starts melting, pour the onion (or shallot) and the courgettes into the frying pan. Cover the frying pan with its lid, reduce heat and cook for some minutes (remember to stir the ingredients sometimes). In case of need., add 1-2 tablespoons of water in order to avoid that the ingredients stick to the frying pan (remember to cover the pan everytime you stir the ingredients!). When the courgettes seems to be nearly cooked, add the slices of the flowers and cook for 2-3 minutes, then remove the pan from the heat.
Add salt and pepper if you like them. Melt the saffron into 1 tablespoon of water, pour it into the frying pan and stir the ingredients slowly.
In the meantime, put some cold water into a big pan and boil it over a medium heat (it's necessary 1 litre if water for 100 grams of pasta). When cooking water is boiling, remember to salt it. Then pour the pasta into the boiling water, mix with a wooden spoon or fork with a long handle in order to avoid that it sticks. Once the cooking water is boiling again, check the clock: on the pasta packaging it should be written the cooking time (approx 10-15 minutes for the most shapes of dry pasta), in any case I prefer to taste it after 10 minutes and see if it is cooked or not (I repeat this operation two or three times until the pasta is cooked).
When the pasta is ready, pour it into the frying pan and stir. Before serving, your can add some grated Parmigiano Reggiano and one knob of butter.

NOTE: instead of the courgettes you can use the asparagus or small peas. I've already tested all versions and I like them.

Enjoy your meal!

.

Read more...

Semifreddo con meringhe e cioccolato

>> 25 maggio 2008

© Riproduzione riservata.


Ricetta con indicazioni per i celiaci.

E' una ricetta che avevo copiato diversi anni fà da una mini rivista di cucina, credo si chiamasse Guida Cucina e che ogni tanto faccio e conservo in freezer in caso di ospiti improvvisi.

Ingredienti per 4 persone:
- 3 uova (separare i tuorli dagli albumi)
- 70 gr zucchero a velo (*)
- 350 gr panna fresca da montare
- 2 grosse meringhe (*)
- 100 gr cioccolato fondente (*)
(*) per i celiaci: utilizzare solo i prodotti elencati nelle categorie "zucchero a velo", "biscotti-dolci-merendine" e "cioccolato e uova di cioccolato" del Prontuario A.I.C. attualmente in vigore oppure prodotti che siano chiaramente dichiarati "senza glutine" in etichetta dal produttore, come da Regolamento (CE) n° 41/2009 del 20/01/2009 e successive modifiche.

Sbattere bene i 3 tuorli con lo zucchero fino a renderli spumosi. Montare a neve solo 2 albumi e incorporarli ai tuorli mescolando piano dal basso verso l'alto per evitare che il composto perda la sua consistenza. Montare la panna e incorporare anche quella poca x volta, facendo sempre attenzione. Sbiciolare le meringhe e triturare il cioccolato e unire anche questi due ingredienti al composto. Foderare uno stampo di alluminio lungo circa 22 cm con carta alluminio (io ho usato la pellicola trasparente) e versare il composto livellandolo x bene.

immagine
Battere lo stampo alcune volte sul piano di lavoro x eliminare i vuoti d'aria. Mettere in freezer per almeno due ore; al momento di servirlo, capovolgere il semifreddo su un piatto da portata e tagliarlo a fette, guarnire con riccioli di panna montata e codette di cioccolato.

immagine
.


Gluten free semi-frozen dessert with chocolate and Italian meringues

This dessert should be prepared some hours before serving or, better, the day before.
Ingredients for 4 servings:
- 3 eggs
- 70 grams icing sugar (= powdered sugar)
[*]- 350 grams fresh double cream or whipping cream
- 2 big Italian meringues [*]
- 100 grams dark chocolate of good quality
[*]
- 1 loaf-tin 22x9x6.5 cm (LxWxH)

[*] all these ingredients must be clearly labelled as "gluten free" and/or "gluten and wheat free" so that this recipe could be safe for coealiacs.

Directions:


First of all, separate the yolks from the egg whites and store them in two separate bowls.
Wisk the yolks with sugar and then wisk TWO egg whites with a wisk or a handblender (I use this one) until the white egg is done, it's better to use a big bowl so that much air as possible is allowed to form bubbles in the egg whites. Add the whipped egg whites to the mixtures of yolks and sugar, stirring with extreme care down and up. Wisk the heavy cream and add it to the other ingredients, fold gently as not to deflate both the egg whites and the whipped cream! Chop the chocolate bar into small pieces and chop the mearingues too. Add these two ingredients to the others and stir the ingredients together slowly.
Line the interior of the loaf-tin with a plastic film or aluminium film in order to avoid that the dessert sticks to the loaf-tin, pour the mixture into the loaf-tin and level the surface with a spatula. Beat the loaf-tin on your worktop in order to eliminate any air pockets and put it into the freezer for two hours at least. Before serving, turn the loaf-into upside down on a chopping board, cut the dessert it
into desired size pieces and dress with some curls of whipped cream and small chips of dark chocolate otherwise dress with hot chocolate.

NOTE: in order to get maximum volume when wisking egg whites, they should be at room temperature and make sure your bowl and whisk are clean and free of grease.

NOTE (1): Italian meringue is a type of dessert made from two simple ingredients: whipped eggs whites and icing sugar (the proportion is approx 80 grams of icing sugar for each egg white). The difficulty lies in cooking the meringues, they must dry not cook in the oven. For this reason they are baked at low temperature (60-70 degrees) for a very long time (2-3 hours).

WARNING: pay attention in consuming raw and lightly-cooked eggs due to the slight risk of Salmonella or other food-borne illness. To reduce this risk, use only fresh, properly-refrigerated, clean, grade A or AA eggs with intact shells, and avoid contact between the yolks or whites and the shell.

Enjoy your meal!

© All rights reserved.
.

Read more...

Mousse al cioccolato bianco o nero

>> 10 aprile 2008

© Riproduzione riservata


Cielo uniformemente grigio, pioggerellina che disturba, +8°C e anche domani il meteo non dovrebbe variare di molto, insomma le giornate ideali per prepararsi un dessert che soddisfa il palato. Di solito si prepara quella al cioccolato fondente, per i più golosastri potrebbe essere una dolce variante quella al cioccolato bianco. Visto che non a tutti piace il ciocco bianco, vi propongo entrambe le ricette.
E' una ricetta stra-collaudata che faccio ormai da tanti anni e mi aveva dato la stessa ragazza che mi aveva passato la ricetta della panna cotta.
Ingredienti (per 6 persone):
200 g cioccolata bianca di buona qualità (*)
3 uova (conservare separatamente i tuorli dagli albumi)
90 g zucchero
300 g panna fresca da montare


(*) per i celiaci: utilizzare solo i prodotti elencati nella categoria "cioccolato e uova di cioccolato" del Prontuario dell'A.I.C. e/o quelli che recano chiaramente in etichetta la dicitura "senza glutine" come da Regolamento CE n° 41/2009 e successive modifiche e integrazioni.

Sciogliere a bagno maria il cioccolato tagliato a pezzetti (da un po' di tempo sto usando il microonde per sciogliere il ciocco e mi trovo bene). Sbattere con una frusta i tuorli con lo zucchero fino ad ottenere un composto spumoso, amalgamare gli albumi montati a neve con un movimento lento dal basso verso l'alto in modo da non smontarli).
Quindi unire il cioccolato fuso continuando a rimestare con cura per evitare che si formi un blocco di cioccolato al centro del contenitore (mescolate gente). Montare la panna ed unirla al composto mescolando sempre nello stesso senso e lentamente. Suddividere il composto in coppette singole e riporre in frigo per almeno 2-3 ore prima di servire. Guarnire le coppette con codette di cioccolato o riccioli di panna o biscotti tipo "lingue di gatto" o cialdine tipo quelle dalla foto prima di servire (togliere dal frigo qualche minuto prima di portarle in tavola in modo che non siano eccessivamente fredde).

Mousse al cioccolato fondente:200 g cioccolata fondente di buona qualità (*)
3 uova (conservare separatamente i tuorli dagli albumi)
150 g zucchero
300 g panna fresca da montare
Preparazione: uguale a quella della mousse al cioccolato bianco
(*) per i celiaci: utilizzare solo i prodotti elencati nella categoria "cioccolato e uova di cioccolato" del Prontuario dell'A.I.C. e/o quelli inseriti nel Registro Nazionale Alimenti dietetici senza glutine del Ministero della Salute attualmente validi.

VINI: Moscato DOCG come per esempio Moscato Chiriera dell'azienda Servetti Vini di Cassine (Al), La Caliera Moscato d'Asti dell'azienda Borgo Maragliano di Loazzolo (At) ; se invece preferite un vino da meditazione, consiglio il Barolo Chinato Ceretto.

NOTA: talvolta le preparo entrambe e poi nelle coppe metto prima uno strato di mousse al cioccolato fondente e sopra uno di mousse al cioccolato bianco.


.

Gluten free white chocolate mousse or dark chocolate mousse:
.

It's April but the weather is much more similar to Autumn than Spring! It's raining, foggy and a little cold (+8°/10C during the day). As the temperature is lower than the average at this time of year, I'd think that it could be a good idea to prepare a sweet dessert like the “white chocolate mousse” or “dark chocolate mousse” as you like.
The recipe of dark chocolate mousse was given to me by the same girl that gave the recipe of "Panna cotta" a lot of year ago. Some years ago I replaced the dark chocolate with white chocolate and my guests and I appreciated this dessert. For this reason, I'm writing both recipes.
White chocolate mousse - Ingredients for 6 servings:
- 200 grams white chocolate of good quality [*]
- 3 eggs
- 90 grams sugar
- 300 grams double cream or whipping cream

[*] all these ingredients must be clearly labelled as "gluten free" and/or "gluten and wheat free" so that this recipe could be safe for coealiacs.
Directions:
First of all, separate the yolks from the egg whites and store them in two separate bowls. Chop the chocolate bar into uniform pieces and melt them in a microwave or over a hot-water bath. There are a lot of instructions how to melt chocolate on the Internet (Google is useful).
Put the sugar in the bowl with the yolks and whisk these ingredients together (you have to obtain a creamy and soft mixture).
Wisk the egg whites with a wisk or a handblender (I use this one) until the white egg is done, it's better to use a big bowl so that much air as possible is allowed to form bubbles in the egg whites.
Add the whipped egg whites to the mixtures of yolks and sugar, stirring with extreme care down and up. Fold gently as not to deflate the egg whites! Add the melted chocolate and stir the ingredients together slowly but carefully.
Turn cream into whipped cream by mixing it with a handblender or a kitchen-robot, then add it to the mixture and stir slowly again.
Divide this mixture into 6 individual small bowls and put into the fridge for 2-3 hours at least. Before serving, dress with some curls of whipped cream or wafers as the ones in the photo.

NOTE: in order to get maximum volume when wisking egg whites, they should be at room temperature and make sure your bowl and whisk are clean and free of grease.

Dark chocolate mousse - Ingredients for 6 servings:
- 200 grams dark chocolate of good quality [*]
- 3 eggs
- 150 grams sugar
- 300 grams double cream or whipping cream

[*] all these ingredients must be clearly labelled as "gluten free" and/or "gluten and wheat free" so that this recipe could be safe for coealiacs.

Directions:
see above
Notes: see above

WARNING: pay attention in consuming raw and lightly-cooked eggs due to the slight risk of Salmonella or other food-borne illness. To reduce this risk, use only fresh, properly-refrigerated, clean, grade A or AA eggs with intact shells, and avoid contact between the yolks or whites and the shell.

WINES: I accompany this dessert with Piedmontese Moscato, it's a sweet sparkling wine with an intense aroma and it's the typical dessert wine in my region. I like these Moscato wines: Moscato Chiriera (producer: Servetti Vini), Moscato La Caliera (producer: Azienda Agr. Borgo Maragliano), Moscato d'Asti DOCG Cardona (producer: Marina Mangiarotti).
For conoisseurs: Barolo Chinato Ceretto (producer: Ceretto), it's an aromatic wine and it's prepared using Barolo wine with infusion of China Calissaja bark.

© All Rights Reserved.
.

Read more...

Vitello tonnato

>> 8 aprile 2008

© Riproduzione riservata
Ricetta con indicazioni anche per i celiaci.

immagineSolitamente mi faccio dare il rotondino dal macellaio per preparare il vitello tonnato, una volta mi aveva rifilato un pezzo di sottopesce ma non mi ha soddisfatta perchè mi è sembrata decisamente più filamentosa come carne! Il rotondino è un taglio di carne di 1° categoria e è conosciuto anche con i seguenti nomi: girello, magatello, coscia rotonda e lacerto (Wikipedia docet). Il vitello tonnato è una ricetta della cucina Piemontese ma, come spesso succede, diverse città se ne contendono la paternità. A me piace molto sia come antipasto che in estate servito come piatto unico e accompagnato da una bella insalata mista e un buon vino bianco fresco.

Ingredienti:
700 gr rotondino di vitello, aromatizzato sulla superficie con una macinata di pepe nero
1/2 carota (se grande)

1/2 gambo sedano (se grande)
3-4 gambi e foglie di prezzemolo
1/2 cipolla bianca (se grande)
2 foglie di alloro
5-7 olivelle liguri
10 gr capperi dissalati
2 confezioni piccole di tonno sott'olio (credo che il peso del prodotto sgocciolato sia circa 56gr/cad)
5 cm circa di pasta d'acciughe (*) oppure 2-3 acciughe dissalate e diliscate
circa 4 cucchiai da minestra di maionese
(*), meglio se si usa quella fatta in casa
alcune olivelle e capperi per decorare


(*) per i celiaci: utilizzare solo i prodotti elencati nella categoria "maionese - patè - salse" del Prontuario dell'A.I.C. oppure prodotti che siano chiaramente dichiarati "senza glutine" in etichetta dal produttore, come da Regolamento (CE) n° 41/2009 del 20/01/2009 e successive modifiche.

Preparare la maionese. Mettere a cuocere tutti i gusti tagliati grossolanamente in una pentola capace, portare a ebollizione e poi salare; aggiungere la carne e far cuocere per poco più di 35 minuti girandola spesso.
immagineLasciare poi raffreddare il tutto nel brodo di cottura (si insaporisce meglio e soprattutto la carne non asciuga). Quando la carne è fredda, tagliarla a fette sottili e disporla sul piatto di portata (se non devo utilizzarla tutta di solito porziono e congelo le fette già tagliate).

Preparare la salsina frullando insieme i capperi, le olive snocciolate, la pasta d'acciughe (o le acciughe dissalate), in un secondo tempo aggiungere il tonno sminuzzato e poi la maionese, rimescolando ogni tanto, fino ad ottenere una cremina.
Se la preferite più liquida, potete allungarla con un po' di brodo di cottura della carne.
Adagiare il composto sulla carne, decorando a piacere con altre olivelle e capperi dissalati oppure con qualche fettina di limone tagliata sottile e delle foglioline di prezzemolo; servire a temperatura ambiente.

TAGLIO DI CARNE: magatello

VINI: di preferenza abbino un vino bianco Piemontese ben strutturato come il Roero Arneis, l'Erbaluce di Caluso o qualche etichetta di Cortese di Gavi; mi è anche già capitato di servirlo con un Blanc de Morgex et La Salle (Valle d'Aosta).
.


Gluten free veal in tuna-fish sauce

This typical Piedmontese recipe, should be prepared some hours before serving or, better, the day before. It's usually served as "entree" but, during summer, I like eating this course served with a rich salad.
Ingredients for 4-6 servings:
700 grams veal (eye-of-round/round steak)
½ carrot (if it's big) or 1 carrot (if it's small)
½ stalk of celery (if it's big) or 1 stalk of celery (if it's small)
3-4 stalks of parsley
½ white onion (if it's big) or 1 white onion (if it's small)
2 leaves of laurel
5-7 black olives
10 grams salted capers
100 grams tuna-fish tin in pure olive oil

1-2 salted anchovies
4 tablespoon mayonnaise (mayo) [*]
fresh black minced pepper
salt
Garnish (with):
1) some black olives and some desalinated capers
2) some slices of lemon and some leaves of parsley

[*] all these ingredients must be clearly labelled as "gluten free" and/or "gluten and wheat free" so that this recipe could be safe for coealiacs.

Directions:
First of all, wash the vegetables, wash and bone the anchovies, rinse the capers 2-3 times, then dry them. Remove the cores from the olives.
Cut the vegetables (carrot, celery, parsley and onion) coarsely and put into a big pot over a medium heat with some water (caution: water has to cover the meat!), when boiling salt the broth. Massage the meat with some black minced pepper and put it in the boiling broth together the leaves of laurel, cook semi-covered until fork-tender. Turn the meat every so often, paying attention not to pierce the meat. When the meat is fork-tender, turn off. Cool the meat in its broth; when it's cool (I usually put some hours in the fridge), remove from the broth and slice it thin.
One hour before serving, you can prepare the sauce. Put the filets of anchovies, the capers, the olives and tuna-fish into a kitchen-robot and mix them, then add the mayonnaise and stir the ingredients until you obtain a creamy sauce (if you like a sauce much more creamy, add more mayo).
Lay the slices of meat on a big serving dish and dress them with the sauce, then garnish with some black olives and desalinated capers or some slices of lemon and some leaves of parsley.


WINES: I accompany this course with white Piedmontese wines or another white Italian wine
with good body usually.
- WHITE PIEDMONTESE WINES: Roero Arneis ; Erbaluce di Caluso ; Cortese di Gavi ; Chardonnay.
- WHITE ITALIAN WINES: Blanc de Morgex et la Salle ; Riesling Italico Oltrepò Pavese .

Enjoy your meal!
.
© All Rights Reserved.
.

Read more...

Salsa alle fragole per dessert (senza glutine)

>> 4 aprile 2008

© Riproduzione riservata.

Ottima per accompagnare il gelato e la panna cotta, veloce da cucinare e preparata con ingredienti "naturalmente senza glutine", quindi è adatta a chi soffre di celiachia.


Ingredienti per 4 persone:

  • 200gr di fragole, mature ma sode (uso solo frutta fresca)
  • 70gr di zucchero (a me non piace troppo dolce, si può sempre aggiungere dopo aver cotto la salsa)
  • succo di 1/2 limone


Lavare ripetutamente le fragole e tagliarle a pezzettini, metterle in un pentolino con il succo di mezzo limone e lo zucchero e far cuocere a fuoco basso per circa un quarto d'ora mescolando di tanto in tanto. Togliere il pentolino dal fuoco e con il minipimer frullare il composto fino a ottenere una salsina, se non vi piacciono i semini e la peluria nera delle fragole potete filtrarla con un colino (a me piacciono perchè conferiscono alla salsa un aspetto più "rustico" e meno artificioso). Lasciarla raffreddare a temperatura ambiente e poi mettterla in frigo per una mezz'ora prima di utilizzarla come guarnitura.
.

Gluten free strawberries sauce


It's easy and it's a very good filling for ice-creams and Italian puddings like "Panna Cotta", all the ingredients are naturally gluten free!


Ingredients for 4 servings:
- 200 grams fresh red strawberries (I use fresh fruit only)
- 70 grams sugar (I don't like too sweet sauce)
- 1/2 lemon juice


Wash the strawberries sometimes and cut them into small pieces. Put the strawberries into a small saucepan, add both the lemon juice and the sugar and heat over a small heat for approx 15 minutes. Stir all the ingredients for some times, then mix the sauce with a handblender or a kitchen-robot. If you want you can filter the sauce, I don't filter it.
I'd suggest to taste and, if necessary, add some sugar.
Cool the sauce undercovered on your worktop and then put into the fridge for 30 minutes before dressing your desserts.

Enjoy your meal!
.


© All Rights Reserved
.
.

Read more...

Busecca d'uova

>> 20 marzo 2008


© Riproduzione riservata.

immagineRicetta con indicazioni per i celiaci.La Busecca è fatta con la trippa ma, in questa ricetta che aveva insegnato la Sig.ra Lucia di Arenzano a mia madre diversi anni fà, si usano le uova. E' un piatto semplice e gustoso che si può cucinare, al posto della solita frittata, quando capita di avere qualche uovo in più in frigo.


Ingredienti per 4 persone:

  • 8 uova di media grandezza
  • 80 gr di pancetta affumicata tagliata a tocchettini (*)
  • passata di pomodoro q.b. (ce ne vuole un quantitativo sufficiente per condire adeguatamente le striscioline di omelette ma non occorre esagerare ,date un'occhiata alla foto).
  • trito di carota/sedano/cipolla/aglio 
  • Parmigiano Reggiano grattugiato
  • sale e pepe
  • burro per friggere q.b.
(*) per i celiaci: utilizzare solo i prodotti elencati nella categoria "salumi-insaccati" del Prontuario A.I.C. attualmente in vigore oppure prodotti che siano chiaramente dichiarati "senza glutine" in etichetta dal produttore, come da Regolamento (CE) n° 41/2009 del 20/01/2009 e successive modifiche.


Metto in un tegame antiaderente la pancetta tagliata (senza olio) e la lascio scaldare per poco tempo (fino a quando il grasso comincia a sciogliersi), poi aggiungo il trito di carota/sedano/cipolla/aglio, lascio colorire leggermente, infine aggiungo la passata di pomodoro, regolo di sale e pepe e lascio cuocere incoperchiato per alcuni minuti.

Per rendere il piatto più saporito far soffriggere la pancetta in un po' di olio.

Mentre il sugo cuoce, preparo il composto per fare gli omelette. In una ciotola sbatto con una forchetta le uova con qualche manciata di parmigiano grattugiato, sale e pepe. In una padella antiaderente metto un pezzetto di burro e lo passo bene sulla superficie, quando è caldo verso una parte del composto e preparo il primo omelette. Proseguo nello stesso modo fino a esaurire il composto. Man mano che sono pronti impilo gli omelette l'uno sull'altro distanziandoli con della carta da cucina. Quando si sono raffreddati li taglio a metà lungo il diametro e poi a strisce larghe circa 1cm e mezzo.
Li verso poi nel sugo caldo e lascio insaporire per alcuni minuti su fuoco basso, mescolando ogni tanto per far si che si amalgamino bene con il condimento ........ la pietanza è pronta!
immagine


Gluten free omelettes slices with tomato sauce

It's a very old recipe and it was given from Ms. Lucia to my mother a lot of years ago (I was a baby!). My husband and I like it very much and I try to explain; by the way the photo, you can see here: http://img.photobucket.com/albums/v493/Ladiko/busecca_uova.jpg

Ingredients for 4 servings:
  • 8 fresh eggs
  • 80 grams bacon [*]
  • some tomato sauce
  • 1 small carrot, finely chopped
  • 1 small onion, finely chopped
  • ½ clove, finely chopped
  • ½ stalk of celery, finely chopped
  • “Parmigiano Reggiano” cheese (Italian Parmigiano is gluten free!)
  • salt, peper
  • butter

[*] all these ingredients must be clearly labelled as "gluten free" and/or "gluten and wheat free" so that this recipe could be safe for coealiacs.

First of all, prepare the omelettes. Put 2 eggs into a bowl, add one handful of Parmigiano Reggiano cheese, a little bit of milk, some fresh-ground pepper and salt. Wisk these ingredients with a fork. Put a non-stick frying pan over the low-mediaum heat and add a small piece of butter, when it's melted swish it around, pour the mixture of eggs into the frying pan and prepare the first omelette. Repeat the same instructions and prepare other 3 omelettes.
I usually put them one on the other on a dish but I separate each other with a sheet of cooking paper. Cool the omelettes undercovered on your worktop; when they are cold, with a knife cut the omelettes into some slices (width: 1,5 centimetres approx).
Cut the bacon into slices or small cubes and put into a large non-stick frying pan on a medium heat (I don't use oil but if you want you can heat 1-2 tablespoon of oil before adding the bacon). In the meantime chop the vegetables and then add them to the bacon, give a good stir together with a wooden spoon. After few minutes add some tablespoon of tomato sauce. I don't establish in advance the quantity, I put some tablespoon (it should be enaugh to dress the omelettes well, look at the photo).
When the tomato sauce is ready (you've to cook for few minutes), add the omelette slices and cook for a few time. Serve hot!

NOTE: sometimes I add a pinch of fresh marjoram to the mixture of eggs.

Enjoy your meal!


© All Rights Reserved.

.

Read more...

Insalata di pasta alla Mediterranea

>> 14 marzo 2008


© Riproduzione riservata.


Con questa ricetta partecipo al contest "Ricette per il pranzo in ufficio" del blog Una cucina tutta per sè. Mi è piaciuta molto questa iniziativa anche perchè, quando lavoravo, ogni tanto mi capitava di dovermi fermare in ufficio per pranzo e, dopo aver scoperto di essere celiaca, il panificio vicino all'azienda con i suoi gustosi panini era per me diventato off limits. Così mi portavo qualcosa di semplice da casa che preparavo la sera prima o di buon ora prima di andare al lavoro, qualcosa che non richiedesse il riscaldamento poichè non ne avevo la possibilità.


E' buona sia nella versione più estiva (pasta fredda o appena tiepida) che in quella invernale (pasta calda), semplice ma gustosa diventa un piatto unico. Si presta anche a esser preparata con un certo anticipo e poi gustata riscaldandola appena in un microonde.

Ingredienti per 4 persone:

  • 320gr di pasta corta es. penne, fusilli, maccheroncini ..... ecc. (*) 
  • 200gr pomodoro fresco (es. Pachino) oppure in scatola
  • 50gr olive nere Taggiasche con nocciolo
  • 50gr olive verdi con nocciolo
  • 40gr capperi di Pantelleria
  • 2 mozzarelle fiordilatte da 125gr/cad
  • olio e.v.o.
  • qualche foglia di basilico fresco per guarnire
  • origano Siciliano

(*) per i celiaci: utilizzare solo i prodotti elencati
nella categoria "pasta-gnocchi" del Prontuario dell'A.I.C. oppure prodotti che siano chiaramente dichiarati "senza glutine" in etichetta dal produttore, come da Regolamento (CE) n° 41/2009 del 20/01/2009 e successive modifiche e integrazioni.


Come pasta senza glutine, a mio avviso, trovo che la migliore come consistenza e palatabilità sia quella prodotta con sola farina di mais. De gustibus .....

Versione "estiva":
Dissalare i capperi in acqua, cambiandola 2-3 volte. Far cuocere la pasta in abbondante acqua salata; non appena è cotta scolarla e metterla sotto al rubinetto per raffreddarla e fermare la cottura. Versarla in una ciotola e condirla con un filo di olio e.v.o. e mescolare per evitare che si attacchi. Tagliare la mozzarella a pezzetti e metterla nello scolapasta per far fuoriuscire un po' di siero. Tagliare i pomodori a pezzetti e togliere i semi e l'acqua di vegetazione. Mettere nella ciotola della pasta ormai fredda tutti gli ingredienti: olive verdi e nere, i capperi dssalati, i pomodori a pezzetti, la mozzarella a pezzi, mescolare e condire se necessario con ancora un po' di olio e.v.o., aggiungere dell'origano a piacere e guarnire con qualche foglia di basilico fresco.


NOTA: per arricchirla ulteriormente si può aggiungere una scatoletta di tonno da 160gr.
Nella versione "invernale" non si raffredda la pasta, la mozzarella a contatto con la pasta calda tende a sciogliersi ma a me piace anche così


Gluten free pasta-salad with tomatoes, mozzarella, olives ...... etc.

First of all, buy a good-quality commercial dry pasta (pasta has to be "made in Italy" preferably). By the way the shapes, I always use "fusilli" or "penne rigate" or "mezze penne rigate" or "sedani rigati" ...... or any other short pasta (I don't use "ditalini rigati" for this recipe because they're too short). These shapes are rather common and you should find abroad easily.


In the photo you can see, from left to right, the following shapes:

- sedani rigati (ridged tubes)
- ditalini rigati (small ridged tubes)
- fusilli (twists)
- mezze penne rigate (ridged half quills)

As you know, we (Italians) have a lot of fantasy and each producer can call the shapes in a different manner.
This pasta salad is very easy and and it can be served both cold or at room temperature during the hot season; we like it very much and it becomes a unique course.

Ingredients for 4 servings:
- 320 grams gluten free short dry pasta [*]
- 2 mozzarella (100-125 grams/each)
- black and green olives (100 grams in total)
- 150-200 grams small red tomatoes
- 40 grams salted capers
- extra-virgin olive oil
- oregano (Origanum vulgare)


[*] all these ingredients must be clearly labelled as "gluten free" and/or "gluten and wheat free" so that this recipe could be safe for coealiacs.


Directions:
First of all, put the salted capers into a cup with some water and change it 2-3 times until they are desalinated. Dry them with a sheet of cooking paper.
Put some cold water into a big pan and boil it over a medium heat (it's necessary 1 litre if water for 100 grams of pasta). When cooking water is boiling, remember to salt it. Then pour the pasta into the boiling water, mix with a wooden spoon or fork with a long handle in order to avoid that it sticks. Once the cooking water is boiling again, check the clock: on the pasta packaging it should be written the cooking time (approx 10-15 minutes for the most shapes of dry pasta), in any case I prefer to taste it after 10 minutes and see if it is cooked or not (I repeat this operation two or three times until the pasta is cooked "al dente"). For this recipe, the pasta should be cooked "al dente" (that is "to the tooth"), here you can find a definition for this cooking texture http://busycooks.about.com/library/glossary/bldefaldente.htm . Drain the pasta through a big colander and put it under some fresh running water in order to stop cooking, then drain again.
While the pasta is cooking, wash the tomatoes, remove the cores from the olives and chopper the mozzarella into small pieces.
Cut the small tomatoes in the middle if they are very small or into 3-4 pieces and put into a big mixing bowl, add the desalinated capers, the olives chopped in two pieces and the mozzarella. Pour the cold pasta and dress with extra-virgin olive oil and oregano (add salt if necessary, I don't use it), stir all the ingredients together and then serve. It's a multicoloured and appetizing main course!


Enjoy your meal!


VARIATION N° 1:
If you prefer a richer dish, you can add the following ingredients also:
- 1 tuna-fish tin in pure olive oil (100 grams approx); before adding to the other ingredients drip it
- 1 red or yellow fresh pepper cut into small pieces


OTHER PHOTOS: main view.


© All Rights Reserved.
.

Read more...

Créme Caramel al microonde

>> 2 marzo 2008

Ricetta con indicazioni anche per i celiaci e cottura solo per il microonde.

immagine
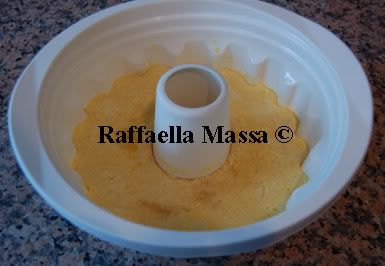
Era già un po' di tempo che volevo acquistare uno stampo in silicone per cuocere il budino nel microonde ma quelli che avevo visto costavano abbastanza o non mi piacevano (colore nero) o erano di grosse dimensioni perchè adatti per torte. Poco prima di Natale ne ho trovato uno in offerta in un supermercato della zona a soli 6 Euro, marca Ghidini. In realtà è uno stampo per Gugelhupf (dolce tipico tedesco che avevo assaggiato in Alsazia e Foresta Nera durante una vacanza un paio di anni fà) diam. 23 centrimetri ma era proprio quello che stavo cercando:

Per la ricetta mi sono basata su quella che Dianella aveva postato sul sito Coquinaria, uno dei più famosi siti Italiani di ricette, solo che non l'ho servito nelle coupelle come prevedeva la ricetta originale.
Ingredienti per 4 persone:
  • 1/2 lt latte intero fresco
  • 100 gr zucchero
  • 5 tuorli d'uovo
  • 1 uovo intero
  • 1 stecca di vaniglia
  • caramello già pronto, se usate quello in bustine da 25gr/cad., ne occorrono due (*)
(*) per i celiaci: utilizzare solo i prodotti elencati nella categoria "preparati per gelati casalinghi e guarnizioni per dolci e gelati" del Prontuario dell'A.I.C. e/o quelli inseriti nel Registro Nazionale Alimenti dietetici senza glutine del Ministero della Salute attualmente validi.

Procedimento:
Versare il latte in una ciotola adatta al microonde, tagliare la stecca di vaniglia in due per il lungo e metterla nel latte, far cuocere a 750W di potenza per 3 minuti (oppure riscaldare il latte e la vaniglia in una pentola sul fornello). Filtrare il latte con un colino per rimuovere i residui di vaniglia.
Distribuire il caramello nello stampo in silicone oppure in 4 stampini monodose in pyrex o ceramica (o qualunque materiale adatto alle microonde). In una ciotola mescolare con una frusta i tuorli, l'uovo intero, lo zucchero senza però farli montare. Aggiungere al composto il latte aromatizzato alla vaniglia, mescolare accuratamente e versarlo nello stampo in silicone o negli stampini, infornare e cuocere nel microonde a 650W di potenza per 5 minuti e poi 500W per 1 minuto.

Il risultato?
immagine e veloce da preparare, è stato spazzolato in fretta!

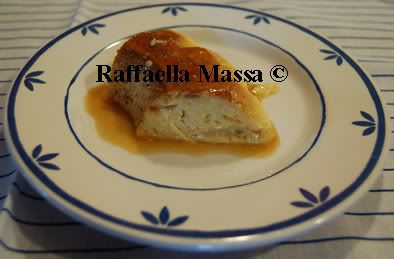
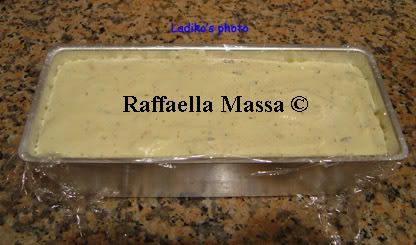
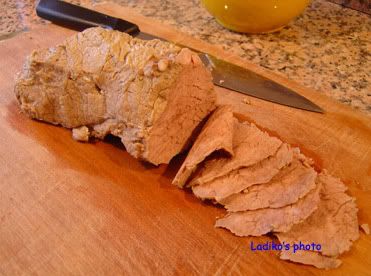
Foto: il budino appena tolto dal forno a microonde.
immagine


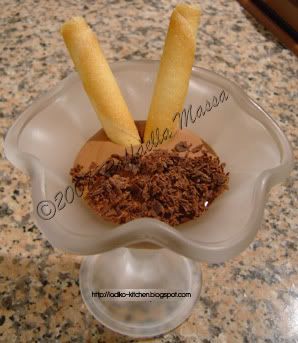
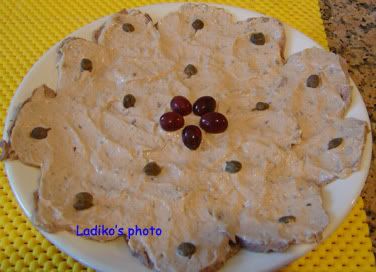
Lasciare raffreddare il budino nella stampo e poi metterlo in frigo per 2-3 ore prima di rovesciarlo sul piatto e servirlo.
immagine


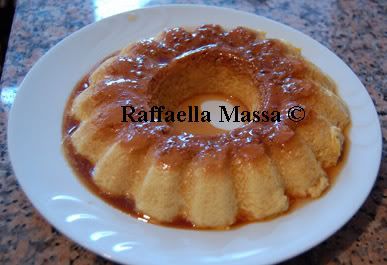
NOTA: i tempi di cottura sopra indicati si riferiscono al mio forno a microonde Whirlpool mod. Talent MT52 da 26 litri di capacità e sono puramente indicativi in quanto possono variare da forno a forno e, inoltre, dipendono anche dalle quantità utilizzate.


NOTE:
se non avete la stecca di vaniglia in casa è possibile utilizzare la vanillina (venduta in bustine monodose) anche se il risultato non è lo stesso. La stecca naturale di vaniglia conferisce al budino un aroma migliore rispetto alla vanillina che è un prodotto di origine sintetica. Anche per quanto riguarda il latte c'è una considerazione da fare in quanto è possibile usare il latte parzialmente scremato (47 kcal/100ml) al posto di quello intero (64 kcal/100ml) ma, secondo me, la differenza nel sapore non vale la differenza di calorie. In ogni caso, preferisco sempre il latte fresco pastorizzato rispetto a quello UHT (o lunga conservazione) perchè il primo presenta caratteristiche organolettiche superiori rispetto al secondo. De gustibus .....
I dati sulle calorie li ho rilevati da due confezioni di latte fresco (scremato e intero) della Centrale del Latte di Alessandria.


Gluten free Créme Caramel (microwave)


immagineThis pudding is cooked into the microwave oven and you need a silicon bake mould too, I use a “Gugelhopf” silicon mould whose diameter is 23 centimeters because I hadn't found a silicon pudding mould.


Here is my silicon mould: it's useful because it has got a rigid plastic ring (it's called "safe ring") that helps you when moving the full mould.


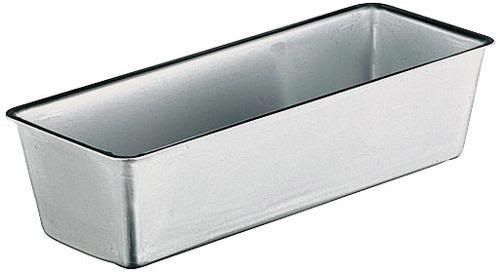
If you haven't any silicon moulds, you can use 6 individual custard cups as per the one in the photo. It's feldspar porcelain and it's microwave-safe. Its diameter is approx 7.5 centrimetres. When using these individual custard cups, arrange them in circle on the glass turntable (towards the egdes).


Ingredients for 4-6 servings (they're all naturally gluten free):
- ½ litre of fresh full-cream milk
- 100 grams of sugar
- 5 fresh yolks
- 1 fresh egg
- 1 stik of vanilla (or pure vanilla extract, approx one teaspoon)
- 100 grams of sugar and 4 tablespoon of water for making the caramel


Direction:
First of all make the caramel and p
our it into the silicon mould, turning around quickly to cover its sides uniformly. How to prepare the caramel: melt the sugar (100 grams) with 4 tablespoon of water into a saucepan with a heavy bottom. Blend with a spoon continuously until the sugar becomes goldened and caramellized.
Cut the stick of vanilla in the sense of the lenght, pour both the milk and vanilla into a saucepan that can be used in the microwave (for example a glass or ceramic saucepan) and cook for 3 minutes (power: 750W). Remove the stick of vanilla and filter the milk.
In the meantime, put 5 fresh yolks + 1 fresh egg + 100 grams of sugar into a mixing bowl and blend them with a whisk smootly (don't whisk until stiff!). Mix the hot milk with these ingredients, then pour this mixture into the silicon mould. Put the mould into the microwave and cook for 5 minutes (650W microwave power) then 1 minute (500W microwave power). Total cooking time: 6 minutes!

Refrigerate in the mould (leave it undercovered on your worktop), when it is cold, put in the fridge for 2-3 hours. When you are ready to serve, put a plate over the top of the mould, turn upside down and remove the mould.
It's very easy, fast and we like it!
immagine

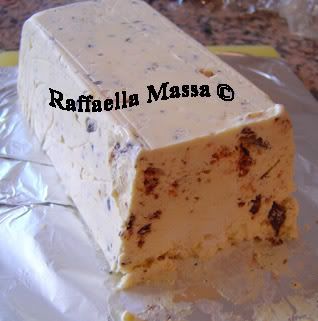
The pudding after cooking

immagine


The pudding ready to eat!


IMPORTANT: my microwave oven is a Whirlpool Talent mod. MT52 (I bought it in year 2003).
Main product features:
- maximum capacity: 26 litres
- microwave power: 1000 Watts (variable)
- grill power: 900 Watts
- glass turntable diameter: 30 centimetres
- cooking power levels in Watts: 5 (90W low – 350W medium-low – 500W medium – 650W medium-high – 750W high)
- cooking functions: microwave, forced air cooking, microwave + forced air cooking, grill, grill + microwave, jet defrost, crisp function, steam, 6th sense defrost, 6th sense crisp, 6th sense steam.

Many recipes for microwave cooking specify which cooking power to use by percent, name or number, for example:100% = high = 10
70% = medium-high = 7
50% = medium = 5
30% = medium-low = 3
10% = low = 1

In any case, please note that both cooking times and cooking powers can change from a microwave to another; I mean that the above mentioned cooking times & powers could not be good for your microwave.

NOTE: you can use skimmed milk instead of full cream-milk but taste is different of course!Enjoy your meal!

All Rights Reserved.

.

Read more...

LinkWithin

  © Blogger template Simple n' Sweet by Ourblogtemplates.com 2009

Back to TOP